
Automating the deployment of your Python backend application ensures that every update made to your codebase is automatically tested and deployed without manual intervention. This process helps reduce errors, streamline development cycles, and provide a more reliable way to manage production environments.
GitLab CI/CD offers a powerful framework to handle these deployments, providing seamless integration with cloud platforms like Fly.io. With GitLab’s flexible pipeline configurations, you can create sophisticated workflows tailored to your needs, including multiple stages for building, testing, and deploying your application.
In this guide, we’ll walk through how to use GitLab CI/CD to deploy a Python backend to Fly.io. From setting up your GitLab pipeline to configuring the necessary Fly.io settings, we’ll cover everything you need to automate your deployment pipeline efficiently. This method is robust and scalable, making it a great solution for managing production-ready environments.
Prerequisites
Before proceeding with the deployment process, make sure you have the following prerequisites:
- GitLab Account: You’ll need a GitLab account to create repositories and configure CI/CD pipelines. If you don’t have one, sign up here.
- Fly.io Account: You will need a Fly.io account to deploy your application to the platform. Create an account here.
- Python Backend Application: A Python backend application is required for this tutorial. If you don’t have one, create a basic FastAPI or Flask app to follow along. We will use the same repository from a previous tutorial, so please ensure you’ve set up your Python backend application by following the steps outlined in the How to Deploy a Python Backend to Fly.io Using GitHub Actions article. Specifically, focus on the Understanding the Application and Dockerfile sections, as these will help you understand how the application is set up and how it will work with GitLab CI/CD.
- Fly.io API Token: You’ll need an API token to authenticate with Fly.io via GitLab CI/CD. You can generate your token by logging into Fly.io, navigating to your account settings, and creating a new access token.
Table of Contents
- GitLab CI/CD Workflow Configuration
- Setting Up the API Token in GitLab CI/CD
- Deploying and Testing the Application
- Conclusion
GitLab CI/CD Workflow Configuration
To automate the deployment of the Python backend to Fly.io using GitLab CI/CD, you need to create a .gitlab-ci.yml file in the root of your repository. This file will define the pipeline and the deployment process for your application. Here’s the configuration:
stages:
  - deploy

.standard-rules:
  rules:
    - if: $CI_COMMIT_BRANCH == $CI_DEFAULT_BRANCH

backend-deploy-job:
  stage: deploy
  image: debian:latest
  before_script:
    - apt-get update && apt-get install -y curl unzip
    - curl -L https://fly.io/install.sh | sh
    - export PATH="$HOME/.fly/bin:$PATH"
  script:
    - cd backend
    - flyctl deploy --remote-only
  variables:
    FLY_API_TOKEN: $FLY_API_TOKEN
This configuration consists of several parts:
-
stages: The stages section defines the pipeline’s different steps. In this case, we only have one stage:
deploy, which is used to deploy the backend to Fly.io. -
.standard-rules: These rules ensure that the deployment pipeline only runs when changes are pushed to the default branch (typically
main). This ensures that only production-ready code is deployed. -
backend-deploy-job: This is the actual job responsible for deploying the backend:
-
stage: Specifies that this job belongs to the
deploystage. -
image: This defines the Docker image to use for the job. Here, we’re using
debian:latest, a minimal base image that includes essential utilities. -
before_script: These commands prepare the environment before the deployment process. First, the package manager is updated, and then essential utilities such as
curlandunzipare installed. After that, Fly.io’s CLI tool (flyctl) is installed. -
script: These are the commands that actually deploy the backend. The pipeline navigates to the
backenddirectory and runs theflyctl deploycommand, which deploys the backend to Fly.io using the remote-only option. -
variables: The
FLY_API_TOKENvariable is used to authenticate with Fly.io. This variable needs to be defined in your GitLab CI/CD environment (we’ll cover this in the next section).
-
stage: Specifies that this job belongs to the
With this configuration in place, GitLab CI/CD will trigger the deployment whenever you push changes to the main branch.
Setting Up the API Token in GitLab CI/CD
To deploy your backend to Fly.io, you need to authenticate using the Fly.io API token. This token allows GitLab CI/CD to interact securely with your Fly.io account. Here’s how to set up the token in your GitLab repository:
- Generate the API Token: If you haven’t already done so, sign in to your Fly.io account, go to your dashboard, and generate a new API token. For a detailed guide on generating the token, refer to this section of this article.
-
Add the Token to GitLab: Now that you have your Fly.io API token, you need to securely add it to GitLab’s CI/CD environment variables.
- First, go to your GitLab repository and click on the Settings option in the left sidebar.
- Hover over the Settings option to reveal a dropdown menu, then select CI/CD from the list.
- On the CI/CD page, scroll down to the Variables section and click on Add Variable.
-
Configure the Variable:
- In the Key field, enter
FLY_API_TOKEN. This matches the variable name used in the.gitlab-ci.ymlfile. - In the Value field, paste the API token you generated earlier.
- Set the Variable Type to be Masked and Protected to ensure the token is encrypted and hidden when used in logs.
- Finally, click Add Variable to save the changes.
- In the Key field, enter
With this, your Fly.io API token is securely added to GitLab’s environment, and your CI/CD pipeline can now authenticate with Fly.io to deploy your application.
Now that your API token is set, let’s move on to deploying and testing the application.
Deploying and Testing the Application
Once the Fly.io API token is set up in GitLab CI/CD and the .gitlab-ci.yml file is in place, you can trigger the pipeline by pushing changes to your repository. The pipeline will automatically start deploying your Python backend to Fly.io.
To trigger the deployment:
-
Push Changes: Make sure your latest changes, including the
.gitlab-ci.ymlfile and any updates to your code, are committed to your GitLab repository. Once pushed, GitLab will detect the changes and automatically run the CI/CD pipeline. -
Monitor the Pipeline:
- You can view the status of the running jobs by navigating to the CI/CD section of your repository.
- Click on Build > Jobs in the left sidebar to see all the running jobs and their logs.
- Alternatively, you can click on the CI/CD icon at the top of the repository page to access the current status of your jobs.
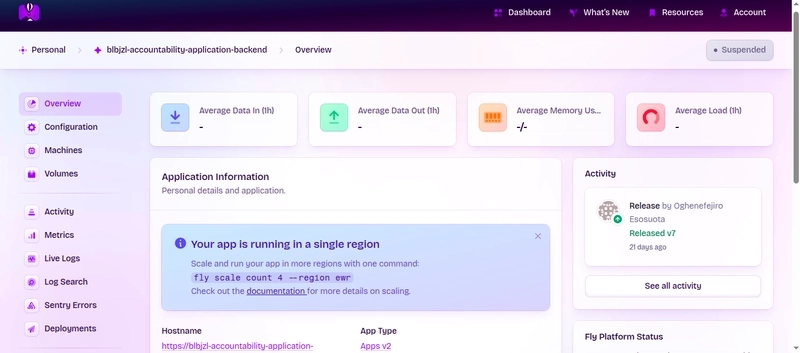
- Check Fly.io Deployment: Once the pipeline is completed, the application will be deployed to Fly.io. You can visit the Fly.io dashboard to view the status of your deployment. To do so, log in to your Fly.io account and go to the dashboard, where you can see your app’s deployment logs, health checks, and other related metrics.
If everything is configured correctly, your backend should now be live on Fly.io. If there are any issues with the deployment, GitLab’s job logs will provide detailed information to help you troubleshoot the problem.
By following this process, you’ve now automated the deployment of your Python backend to Fly.io using GitLab CI/CD, ensuring that every time changes are pushed to your repository, the deployment process is streamlined and efficient.
Conclusion
In this article, we’ve walked through how to automate the deployment of your Python backend to Fly.io using GitLab CI/CD. By setting up the .gitlab-ci.yml.yml file and configuring the Fly.io API token in GitLab CI/CD variables, you’ve created an efficient and automated deployment pipeline.
For more tips and guides like this, feel free to follow me on LinkedIn and check out my portfolio for additional projects and resources.